Red curry veggies over cauliflower fried rice

I had more energy than normal tonight following an awesome workout so I prepped dinner with a little extra love and passion. As it happens, it came out awesome and was actually pretty simply so I wanted to share. I stir-fried a bunch of veggies, made a quick (literally under five minutes) red curry and served it over cauliflower fried rice. The most time-consuming part was food processing the cauliflower, but you could always do this in advance or just dice it up small. Any veggies will do 🙂

Red curry veggies over cauliflower fried rice

Ingredients

for stir fry
coconut oil (or whatever oil you use for higher heat)
LOTS of roughly chopped veggies (I used 1 green bell pepper, 1 zucchini, 1 package of shitaki mushrooms, a few handfuls of bean sprouts, 1 medium yellow onion)
1 clove garlic, roughly chopped

for fried rice
about a thumbs worth of butter (or your favorite fat)
1 head of cauliflower, food processed until rice size
~1 cup frozen peas
3 eggs

for red curry
coconut/extra virgin olive oil
~2 tbsp red curry paste
1/2 can full-fat coconut milk

First, heat coconut oil over medium-high heat in a wok or heavy pan. Toss in all stir fry veggies and cook about ten minutes until soft but still with a bit of crunch and color. Take them off the heat and put to the side.

Next, heat butter in the same pan over medium heat and add cauliflower. Make sure to coat it all with whatever fat you are using and cook until slightly brown and toasted looking, about 10-15 minutes. Then, create a hole in the middle so that pan is showing, add a little more butter and then eggs, beating slightly in the pan. When mostly cooked, stir eggs fully into cauliflower and add peas. Cook another two or three minutes. You can add coconut aminos or soy sauce at the end for flavor.

IMG_3519

You can be be making the curry in a second pan at the same time. Heat up coconut or olive oil over medium-low heat. Add curry paste and toast a few minutes until fragrant. Mix in coconut milk and just heat through. Finally, toss veggies and simmer all together for another five minutes.

Serve over fried rice and enjoy.

IMG_3521

Advertisement

Veggie hacks: 3-bean chili

One day last week, while attempting an aerobic walk during the arctic blast, my friend Lara and I were discussing what to make for dinner, and she mentioned vegetarian chili. This used to be one of my staples, especially when I wasn’t eating meat, but I have not made it forever. So I decided to make one that night. Please note: I wasn’t thinking about this blog when I was cooking, so there are neither pictures nor a precise list of ingredients. This barely counts as a recipe, consider it more of add-on that you can use when developing your own chili with your favorite ingredients or a trusted recipe.

Or, since chili is pretty fool-proof you can just take me at my word.

Really, the only reason I am posting about this at all is that I randomly tried something new that ended up coming out great and I had to share. I chopped the uncooked carrots and portobello mushrooms super fine in the food processor, until they were almost the size and texture of big breadcrumbs. Then I added the mixture to the chili when I put in the tomatoes and broth. The result was that the sauce took on the texture of meat chili, and it added the extra veggies and flavor without more chunks.

Here’s sort of what I did:

Ingredients

A few tbsp EVOO
1 yellow onion, diced
1 red bell pepper, diced
1 green bell pepper, diced
a few garlic cloves, chopped
2-3 carrots, peeled
6-7 baby portobello mushrooms
*Not positive on the quantities of carrots and mushrooms, I would say I had about 1.5 cups of the ground mixture in the end
1 large jalepeño, diced
*spice mixture (more on this below)
1 can each: Red kidney beans, black beans and garbanzo beans, rinsed
1 28-oz can whole peeled tomatoes
~2-3 cups veggie broth (I actually used chicken but can go full veggie here)

  1. Sauté the onion, peppers and garlic in olive oil for 10-15 minutes until onions are golden
  2. Add in chopped chili pepper and your spice mixture. Stir and cook for a few more minutes. I didn’t have chili powder in the house (dumb because I made some for Christmas as gifts and didn’t keep any for myself!) so I mixed together paprika, cumin, salt, pepper, cayenne and turmeric until it tasted good.
  3. Chop carrots and mushrooms in food processor
  4. Stir everything else into the pot: beans, tomatoes, carrot/mushroom mixture and broth as needed (just enough so it’s not too thick)
  5. Boil and then simmer, uncovered, on medium low for an hour.

I’d love to hear how this turns out if you try it, so please share below!

Poaching eggs in the Black Hills

May I first say, sorry for the delay in posting! I intended to post from the road, but some places had no service or electricity and all places took my head so far from the computer that I kept not writing. However, I took pictures of everything we ate along the way so I could catch up once back on the grid. Here we go.

Our first night of camping was in Badlands National Park in South Dakota. The prairie landscape here is described as beautiful and unforgiving, which I can now say is about accurate. We set up our tents and prepared for a silent and powerful sunset.

camping-chairs-and-tent-badlands-sunset

In the morning, we set our for an 8 mile hike across a harsh rock crust trail dotted with sunflowers and grasses.

bandlands-hike-power-breakfast

However, we did not depart without a tasty power breakfast! Since we were still getting a feel for how to keep the camp stove lit in the prairie winds, first morning simplicity was important. Poached eggs are great to make on a camp stove because all you have to do is boil water, and there is minimal cleanup afterwards. Plus, they are soooo good.

Ingredients:
*makes one serving

2 raw eggs
1/2 ripe avocado
1/2 fresh orange
salt and pepper to taste
a dab or two of hot sauce if you wish

poached-eggs-with-avocado-and-orange

Bring a few inches of water to a boil and add a pinch of salt. Crack both eggs into a cup. Once the water is boiled, spin the water to create a whirlpool in the middle of the pot. Then, carefully pour the eggs into the center. Cook for three minutes at a slow boil, and then remove the eggs from the water with a spoon.

Serve with avocado slices and fresh fruit!

Spring Cleaning Veggie Soup

I want to make everything from scratch, all the time. After all, I’m trying to learn how to really cook. Sauces, broths and doughs are fun to try, but they take time and love, and a lot of exploration. Sometimes they fail at 8pm at night when you’ve worked all day, gone to the gym, still have a term paper to write, and are on the verge of transforming into the hunger-induced raging lunatic doppelgänger of your normally normal self. (Who you then have to apologize for in the morning even though you have no memory of her visit…)

Anyway, it’s finals week for me and I have a big project going on at work, so when I went grocery shopping on Sunday I made a point to put together some quick and easy meals. I already had a bunch of veggies in my kitchen from all the big elaborate meals I thought up and “didn’t get to” this week, so with an additional carton of veggie broth and 1 can of beans I was able to make up this soup. Besides clearing out my fridge, it came out pretty tasty. Sometimes it pays to throw in everything but the kitchen sink and see what happens.

Ingredients:
4 celery stalks, diced
1 medium onice, diced
1 large sweet potato, peeled and cubed
4 parsips, peels and sliced
2 garlic cloves, whole
4 cups vegetable broth or stock
2 cups fresh peas (or frozen, or canned if you have them)
1 can great northern beans
1 small tomato, diced
1-2 fresh basis leaves
a pinch of fresh parmesan
a pinch of herbs de provence
a pinch of crushed red pepper
sea salt and pepper to taste
extra virgin olive oil

Image

Preheat the oven to 375 F. Cut the sweet potato and parsnips into 1/2 inch cubes, and lay on a greased baking sheet. Drizzle with olive oil, sprinkle with salt and pepper, and roast for 30 minutes. Turn the pieces over half way. Since the veggies will cook a bit more in the soup, they don’t have to be completely cooked through. Watch them and make sure to remove them from the oven before they start crisping.

In a large sauce pan, heat a bit of olive oil and saute the onions and celery on med-low flame until translucent, about 5 minutes. Try to keep them from browning. Add in the rest of your ingredients, except the beans, and bring to a slow boil. Once boiling, add beans and reduce heat. Simmer, covered, for another 20 minutes.

Top with fresh parmesan to serve. I happened to have some amazing kielbasa in the fridge homemade by a friend of mine in the fridge (thanks Kathrin and Sam!), so we sliced that up and threw it in the leftovers for something different. It was refreshing and satisfying both ways.

Enjoy!

A Berry Nice Surprise

In a moment of great ambition, I volunteered to make pies for my family’s Easter celebration. Baking does not come naturally to me, so I felt a lot of pressure to get these pies right, since there was going to be a crowd of about 20 people. I decided on one strawberry rhubarb and one apple pie. I also decided to buy pre-made crust, and that I was not going to post about this adventure. However, a few things happened and that all changed. First, I found out there is no rhubarb to be found anywhere this time of year. So, with the strawberries already in my cart I decided to try a mixed berry pie. Second, the pies came out great! So here we are 🙂

mixed-berry-fruit-pie-homemade

Mixed Berry Pie
adapted from Epicurious

2 store bought pie crusts (I used the Whole Food’s brand frozen ones, made from only a few whole ingredients)
1-16oz container of strawberries, hulled and halved
1/2 pint fresh blueberries
1/2 pint fresh raspberries
1/2 cup packed brown sugar (dark or light)
1/2 cup white sugar
1/4 cup cornstarch
1tsp ground cinnamon
1/4 tsp salt
1 egg yolk (for glaze)

Preheat over to 400 degrees F. Combine all ingredients except egg yolk in a bowl, and stir until fruit is nice and coated. Line a pie dish with one crust, and fill with fruit mixture. It should be piled nice and high, since the filling will cook down quite a bit. Carefully cover pie with the second crust. Seal by crimping the edges together with a fork nice and tightly. Cut a few slits in the top for vents.

To make the glaze, beat one egg yolk, 1 tsp of water and 1/4 tsp white sugar together. Brush over the top crust.

Bake for 20 minutes at 400F, then reduce temperature to 350F and bake for an additional hour to 1 hour and 25 minutes until golden brown.

Remove from over and cool completely before slicing. Enjoy!

Avocado, Poached Eggs and Toast!

Welcome to my favorite new breakfast/lunch/post work-out/mid-day snack. It’s delicious, hearty and packed with protein. When I am at work and can’t cook eggs, the toast and avocado is a nice replacement. Enjoy!

poached-eggs-with-toast-avocado-hot-sauce

Ingredients:
1 tsp white vinegar
2 eggs
2 slices bread (I use whole wheat sprouted bread)
1/2 ripe avocado
balsamic vinegar
extra virgin olive oil
salt and pepper to taste
optional: hot sauce

To prepare the poached eggs, bring a pot of water to a boil and add a teaspoon of white vinegar. Crack the eggs into a small bowl. When water comes to a slow boil, create an eddy by swirling the water around with a spoon. Drop the eggs into the center of a pot and time 3 minutes.

In the meantime, toast the bread. Spread each side with avocado and drizzle with balsamic vinegar and olive oil.

When the eggs are done, pull them out of the water with a slotted spoon and drain off the excess water. Place one egg on each slice of toast. If desired, top with salt and pepper with hot sauce.

close-up-of-toast-with-eggs

Enjoy!

A Sweet and Savory St. Patrick’s Day Cabbage Alternative

St. Patrick’s Day is here again! I usually do cook a corned beef and cabbage, boiled together in a pot with red potatoes. I’m not Irish, but it is a fun and delicious tradition. This year, however, I decided to branch out. This very special recipe is actually one of my grandma’s. She helped me put it together and document every step in her beautiful and amazing kitchen. I am so lucky to have her to teach me these things and be patient while I photograph her rolling up cabbage about 50 times. This meal takes some time to come together, but its a fun one and definitely worth the elbow grease when you sit down to enjoy it. I think the secret is the subtlety sweet and sour bite of the tomato sauce. People will ask you what you put in here, your call whether you tell them or not.

Of course, no meal is complete without a fine music pairing. Check out Now Streaming’s latest Beats and Eats post featuring this dish for soundtrack and drink suggestions to make the meal complete.

Veggie Stuffed Cabbage
Makes 8-10 servings
total prep and cooking time: 2 hours

Ingredients:

sauce-

2 med onions, peeled and diced
extra virgin olive oil
2 28oz or 2 quart jars whole peeled tomatoes
2 cloves garlic, whole and peeled
sea salt and black pepper to taste
¼ cup brown sugar
juice of 1-1.5 fresh lemons

filling-
1 large head of green cabbage
1 whole onion, peeled and grated/food processed
1 clove garlic, peeled and chopped
1 whole egg, slightly beaten
1 cup brown rice, uncooked
sea salt and pepper to taste
optional twist: 1.5 lbs lean ground meat (beef, turkey and venison work great!)

First, get your cabbage cooking. Fill a large pot with water and bring to a boil. Score the cabbage around the stalk which will make it easier to remove the leaves later. Place the cabbage in boiling water and cook until soft, about 30-40 minutes. Rotate the cabbage a few times while cooking so that all sides are softened.
boiling green cabbage

While that is cooking you can prepare a quick tomato sauce. Heat about ¼ inch of olive oil in a saucepan and brown your onions for 5-7 minutes. Add both cans of tomatoes and bring to a simmer on medium heat. Once the sauce is warm and simmering, add the lemon juice, brown sugar, garlic, salt and pepper. This makes for a slightly sweet and tangy sauce that goes perfectly with the cabbage! Cover sauce and keep it cooking on low heat while you prep everything else.

cooking tomato sauce on the stovetop
Next, mix the stuffing for your cabbage rolls. In a large bowl, combine grated onion, salt and pepper, egg, and garlic. If using meat add that in now. For some extra goodness grate in any veggies you have in the house! Add uncooked rice and mix together with you hands. Everything should be well mixed but only work the stuffing as much as you have to or it will become dense.
mixed brown rice and ground beef for stuffed cabbage

The final step is stuffing the cabbage leaves. Remove the cabbage from the pot and let it cool slightly. However, the leaves are most pliable when they are warm so don’t let them cool too much. If they get stiff you can always soak them in the hot water a bit more.
cooked green stuffed cabbagePeel off the leaves one by one. If they are very big, trim them or cut them in half.

stuffed green cabbagePut a little stuffing on the bottom edge of the leaf (where it attaches to the stalk).
stuffing green cabbage
Carefully fold the leaf around the stuffing by folding in both sides and then rolling it tight from the bottom on.

photo 7 photo 8 photo 9Then place the role into the tomato sauce to simmer. You can layer them onto of each other and fill the pot. The sauce will cook up around them.

fresh stuffed cabbage simmering in the pot

When all the rolls are added, make sure the sauce is simmering. Cover and boil for an additional hour. If you have extra cabbage left, dice it up and throw that in the sauce too. If you have extra meat mixture, roll into little meatballs add those also.
fresh stuffed cabbage rolls cooking in tomato sauce homemade
This dish freezes and reheats well so make extra.
fresh homemade stuffed cabbage rolls ready for storage in the freezer
Enjoy and happy St. Patty’s Day!

Fresh and Clean Beats and Eats Guest Post

This week the homegrown tomato teamed up with Radio Stevie for a fun beats and eats feature on his music blog, Now Streaming.  My Fresh and Clean Shrimp tacos were inspired by Stevie’s soundtrack for the night. It was a blast working backwards and letting the music help me decide what to create.

This fun food, wine and music pairing is sure to please your Valentine, or make a fun night with a good friend. Read the entire post here and don’t forget to let us know what you think. Happy eating!

Image

Eggplant Parmesan, Second Generation Style

Here’s something you should know about me: I live for splurge meals. My absolute all time favorite foods usually fall into this category. In my normal routine, I try to adapt some of these recipes into clean versions, but on splurge day anything goes. Fried stays fried, pasta stands in for itself, and I put cheese on my half too.

It took me approximately 2 seconds too decide what tomato week’s splurge recipe would be. Growing up, my dad (originally from Italy) would make his eggplant parmesan maybe once or twice a year. It’s not a quick undertaking, and I knew it was a big ask to see if he would make it with me so I could blog about it. The thing is, what I really mean by “second generation style” is that I want to learn how to make this dish exactly like his, because it is absolutely perfect. The effort is always worth it. Plus, it makes your house smell sooooo good.

Best of all, eggplant is in season right now and I can’t help but pay thanks to this versatile crop. What a fine nightshade you are, eggplant. Thanks for being you.

Traditional Eggplant Parmesan
makes enough to fill 2 13×9 baking dishes, about 16 servings

Ingredients:
3 medium size eggplants
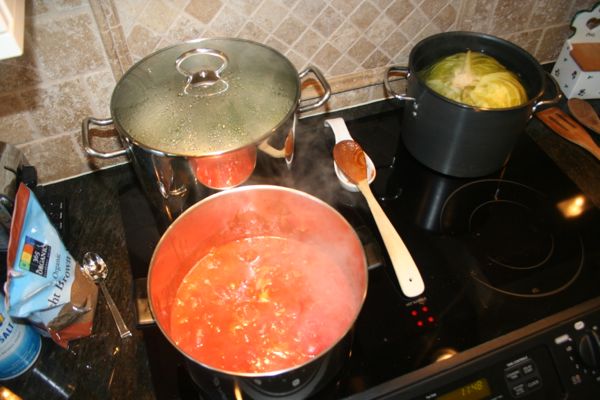
3 quart jars cooked tomato sauce
2 lbs fresh mozzarella cheese
vegetable/ canola oil for frying
2 cups grated romano/ parmesan cheese

for batter:
3 cups all-purpose flour
2 eggs
1 tsp salt
1 tsp pepper
a few cups of cold water

*Note: Since this takes a few hours, I usually make an extra batch to freeze or give away. Cut everything in half if you are only making one dish.

To make your batter, combine flour, salt and pepper in a large bowl. Add eggs, lightly beaten. Once well mixed, start adding water about a half cup at a time. The batter should be the consistency of runny pancake mix. Keep adding water and mixing until the batter is thin enough that it will run off the end of a spoon easily. There should be no lumps.

eggplant-parmesan-batter
Next, trim off both ends of the eggplants and slice them about 1/4 inch thick. Do your best to keep the thickness consistant so the pieces cook evenly.

perfectly-sliced-eggplant-for-homemade-eggplant-parmesan

Meanwhile, in a deep saute pan, heat up 3/4 to an inch of cooking oil on medium heat. Test the oil temperature with a drop of water or batter. It will sizzle when hot. If you have a thermometer, oil temperature should reach between 400-450 F.

Once the oil is ready to go, dip each slice of eggplant in the batter and just cover both sides. Let any excess batter run off, and then carefully place in the hot pan.

deep-frying-eggplant-homemade-eggplant-parmesan

When the underside becomes golden brown (1-2 min), flip them over and fry for another minute or so. When cooked, drain each piece of excess oil as you remove them from the pan.

draining-excess-oil-from-fried-eggplant-for-eggplant-parmesanAs the slices come out of the fryer, lay them on a plate covered with a paper towel to soak up extra grease as they cool.

freshly-fried-eggplant-for-eggplant-parmesan

While the eggplant is frying, grate your mozzarella and parmesan. To make grating easier, place the cheese in the freezer for 15-20 minutes first. Now is also a good time to preheat your oven to 375 F.

grated-parmesan-cheese-for-eggplant-parmesan

If there is any batter left over when the eggplant is done, you can pour it into your hot oil to make a zeppoli, or fried dough ball (more like a pancake in this case.) Cook it the same way as the eggplant.

homemade-zeppoli-frying-in-oil

When it’s done, sprinkle a little powered sugar on top and enjoy! Besides being delicious, this snack might distract you from scarfing down tons of hot, crispy eggplant as it comes out of the pan. It also might not. I usually eat both, and chase them with large chunks of mozzarella. Extras are built into the recipe to allow for this unstoppable force.

powered-sugar-covered-fresh-homemade-zeppoli

Assemble everything in a baking dish in layers. Start with a little bit of sauce on the bottom of the pan, then eggplant, mozz, parm, and a drizzle of sauce.

Repeat until your tray is full. Only use a little bit of sauce in each layer so it doesn’t become too wet.

assembling-homemade-eggplant-parmesan-layers

End with the cheese layer on top.

complete-homemade-eggplant-parmesan

Cover tightly with aluminum foil and bake for 45-60 minutes. Take the foil off for the last 10-15 minutes of cooking to let the top get crispy.

eggplant-parmesan-just-out-of-the-oven

Enjoy! Freeze whatever you can’t eat. This type of dish tastes better every time you heat it up.

detailed-image-of-homemade-eggplant-parmesan

I would also just like to thank my good friend Jennifer for shooting the amazing photos for this blog while helping me fry eggplant for hours. They have added so much to this project, and I hope this is just the first of many collaborations between us. I mean, they’re incredible. I’m not the only one drooling on my computer, right?