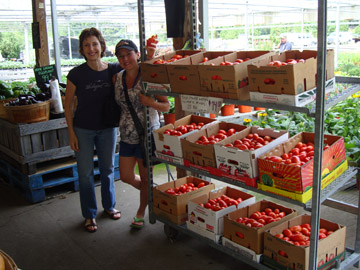
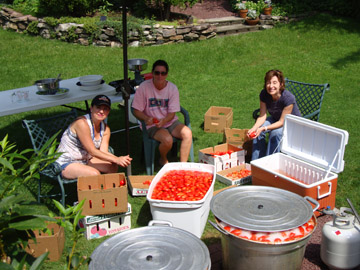
Every August that I can remember has ended with a long, hot day of tomato canning. It’s summer’s most fantastic ritual. All of my extended family members gather in someone’s backyard to sort, cut, boil, crush, jar and seal boxes and boxes of warm, fresh tomatoes (local, but not homegrown I confess.) The smell is more wonderful that you can possible imagine. It’s like all the fantastic things you are going to cook this year, mixed with love and basil. Since last Friday was canning day, I’m kick-starting this blog with an entire week devoted to its namesake, the tomato. Today, we start at the beginning.
How to Can Tomatoes
What you will need:
- plum tomatoes
- fresh basil
- sharp knife
- large pot
- glass jars with lids and rings made for canning
- slotted spoon
- tomato grinder (manual or electric)
- tongs
- large bucket/container
- funnel
- strainer
Before you start, make sure that all of your jars, lid rings and other tools are clean and sterile to avoid trapping bacteria in your jars that will spoil. Running the jars and lids through the dishwasher is an easy way to clean a bunch at once.
Tomato Selection
Plum tomatoes are ideal for tomato sauce because they are pulpy and contain less water than other varieties. There are many types of plum tomatoes, but we usually buy Romas because they are grown locally. San Marzano is another prized plum tomato for canning. Processing tomatoes are commonly sold in 25 lb bulk cases, which each yield about 6-7 quarts of sauce each. So, decide how many quart jars you want to fill before purchasing your tomatoes.

Sort
Since one rotten tomato can spoil the batch, you need to inspect each one individually. If you are not going to actually can on the day you pick up your tomatoes, take them out of the box and lay them to air out. This way, you can find and remove any rotting ones before they spoil the ones around them. Sometimes the tomatoes can use an extra day or two more to fully ripen, so you can leave them out until they seem ready.
Wash
When you’re ready start, go through all the tomatoes again and toss any rotten ones. Look for bruises and blemishes, and cut out any bad spots. Smell any questionable ones to see if they are sour. Then, fill a large container with water and place all the remaining tomatoes inside to rinse.
Boil
Next, take your large pot and fill it with four to five inches of water. It does not need to be filled to the top. Bring the water to a boil, fill the pot with tomatoes, and cover. Steam each batch until they look cooked and are soft. Some will start to split when they are done.
Crush
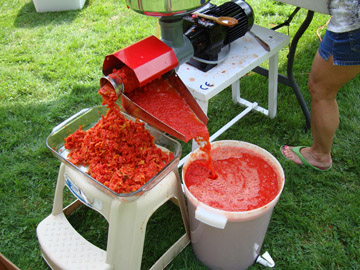
Using a slotted spoon, scoop the cooked tomatoes and transfer them to your strainer to drain. Prick each one to get out excess water. Place a large bucket or container underneath the grinder to catch all the juice. Then, run the tomatoes through your grinder to separate the pulp and juice from skin and seeds. When you’re done, run the skin and seeds through one more time. This helps to thicken up the finished product. If you have a compost area, you can toss the remaining waste right in.
Jar
To prep your jars, spread them out on a large flat surface. I like to put 3-4 fresh basil leaves in each one for flavor. Using a funnel, fill each jar with your crushed tomatoes to within about 1/4 inch of the top. Make sure to wipe any excess off the rim of the jar to ensure a proper seal. Put a seal lid on each jar and loosely screw a ring on. Don’t make it too tight, just tight enough to keep the contents of the jar from spilling.
Seal
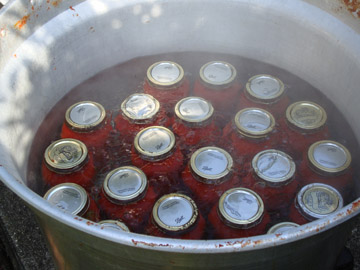
Put enough water in a pot to just cover the lids of your jars, and bring it to a boil. Place jars in the water and boil for 20 minutes. Carefully remove the jars with tongs or a jar gripper and lay them out to cool. You should hear a series of “plinks” as they beging to cool and the tops depress, forming the seal. Check all of your jars as they cool to make sure the tops have depressed. Any that don’t seal properly should be refrigerated and used within a day or two.
Finally, thought it’s torture to wait, put all the jars aside for about 2 weeks and check the lids daily to make sure they are ok. If none burst after a couple of weeks, your seals should be safe and adequate and you can feel free to enjoy!
Coming up during tomato week…
We’ll pop open a few jars, make a basic pasta sauce and try out one of my all time favorite splurges!


Fabulous!!! You are unbelievable!!
So I may actually have to try this next year. It looks amazing!!!
This looks awesome! Do you have any recommendations for good books on canning and preserving?
I don’t! Everything I’ve learned, I’ve learned from my dad or the internet. If I find anything good I will let you know 🙂