I am finally ready to admit that life can get in the way of blogging. Sometimes I let it, but not today.
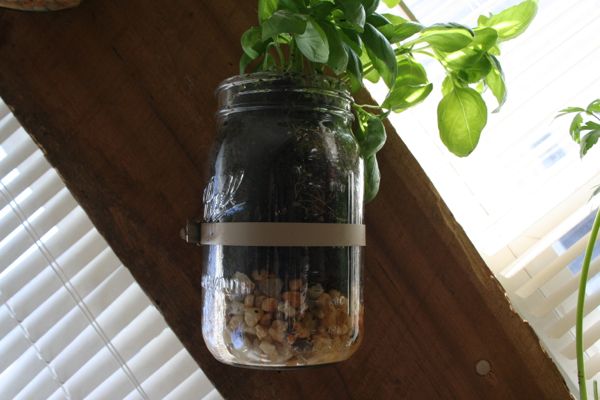
We have a little catching up to do. For my birthday earlier this month, my boyfriend built me a window herb garden out of a hundred year old piece of cedar and some mason jars. It is one of the coolest things I have ever seen. Once it was finished we both just sat and stared at it for a while. I try to face it at all times when I am in the living room. I’m just drawn to it in every way.
Needless to say, my cooking has benefited from this enchanting home improvement as well. Instead of battling the winter alone, I’m heading in with something fresh by my side, and I could not be happier.

From start to finish it only took us about half an hour to build, and the materials did not cost much over $50. I know because $50 is our birthday gift cap. The whole idea of the limit in the first place was to spur a little creativity. Total win.
Here are the instructions for the one we made. It’s pretty user friendly, so you can adjust based on whatever materials you have available.
Materials:
piece of hardwood for a base (piece shown is 3″ thick cedar)
4 widemouth mason jars
4 four inch diameter metal hose clamps
4 one inch sheet rock screws
screw gun
decorative planting stones or small rocks
herb seeds or small seedlings
extra potting soil
khaki colored spray paint, satin finish
Step 1
In a well-ventilated area, spray paint hose clamps and let them dry fully.
Step 2
Mount hose clamps to your base using screws and a screw gun (we did not pre-drill the holes.) Place clamps them where you want the center of each jar to sit. These ones are at an angle so our plants face towards the sun. Leave screws loose enough so that jars can be rotated to upright for watering.

 Step 3
Line each jar with an inch or two of stone. This will keep the plant from getting waterlogged since there is no drainage hole in the bottom of your container. Then add a thin layer of potting soil.
Step 4
Remove seedlings from their containers and gently break apart the root balls a little bit with your fingers. Place each plant in a jar. The base of the plant should rest just below the mouth of the jar. Add more soil on top of the rocks if necessary. Once placed in the jar, fill in around the root ball of the plant with extra potting soil, using your fingers to push soil it into any gaps. Make sure the soil isn’t too compacted.
 Step 5
Slide jars into the hose clamps and then tighten clamps.
Note: Wall mounting materials will vary based on the type of walls you have and how thick your base is. We screwed the base to the wall before mounted the jars, however this can be done in reverse as well.
